


The workshop Organizer is a necessary element for all the people who like or need to work in clean and organized workspace.
Many model makers have already approved it, so if you're still not sure, this is a complete presentation of this accessory and his assembly instruction.
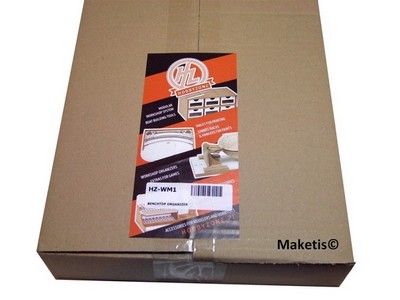
This workshop Organizer is packed in a cardboard 60cm long with a weight of 5kg (which explained higher cost freight) and it's a complete kit. You need 45 min for the assembly and half a day for the complete drying of the glue.
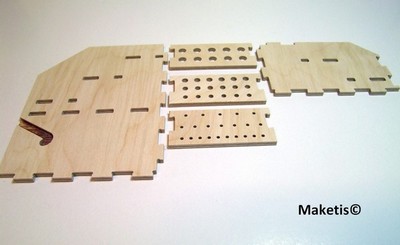
When we open the packaging, we found 52 wooden pieces completely manufactured by a numerical milling machine ! The wood is in excellent quality and without dusts.... Bravo! We quickly realize that HobbyZone is a serious company and the organizer is designed to ensure a long life.
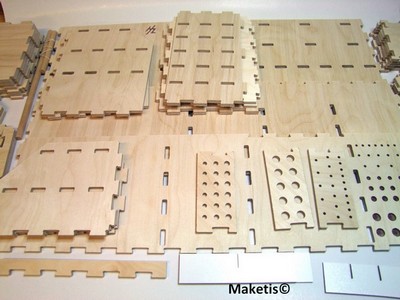
I urge you to do the inventory of the pieces according to the notice and keep separatly the drawers parts.
The assembly could be done with wood white glue or with Cleocol, no need to use specifics tools !
Step 1 : Assembling the drawers
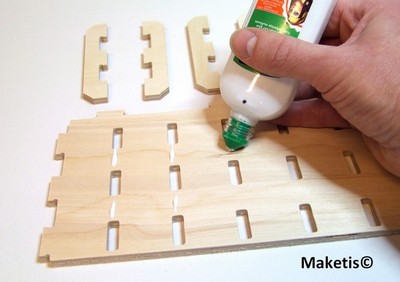
Apply between the crenels a drop of glue, no need to put on too much. You shall repeat this operation for all the next steps.
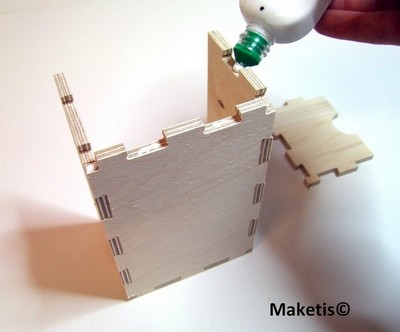
You have time then to present the parts, these assemble well and thanks to a well realized conception, you can't assemble wrong. Smart!
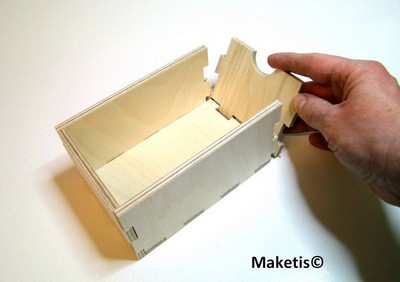
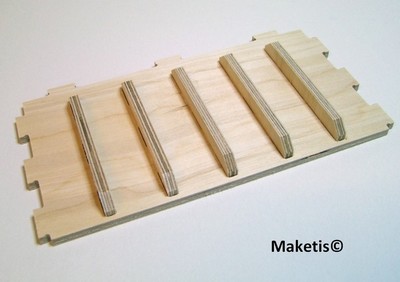
This is the 3 first drawers awaiting drying.... You can hold the parts with an elastic or a small clamp if necessary.
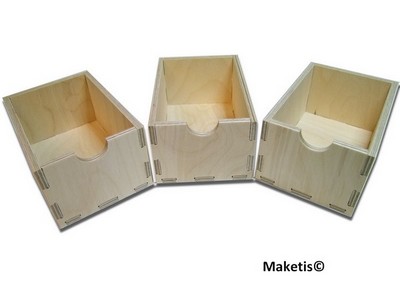
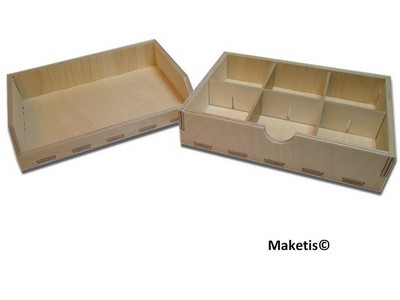
The same goes for the two big drawers with a removable separator and adjustable upon request !
Step 2 : Assembly of the top plate for the storage of flat tools
Likewise step 1, no difficulties. We spread some drops of glue. The applicator Cléocol is really practical and avoids you taking a brush.
Assembly of partitions.
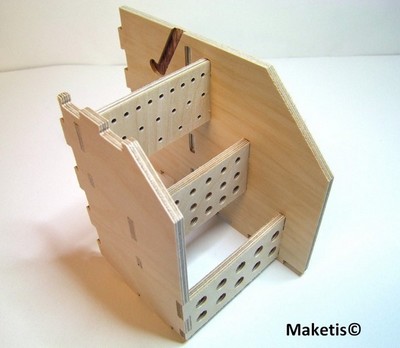
Step 3 : Assembly of the left part for the storage of brushes, drills and small tools.
The part milled on the big piece will be used to put the support with roller kitchen roll.
Do not make a mistake about order, at first the big holes at the top then we end with the finest. For a good connexion of the pieces, you can press them with your fist or with a mallet.
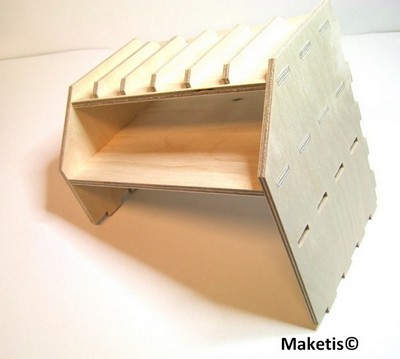
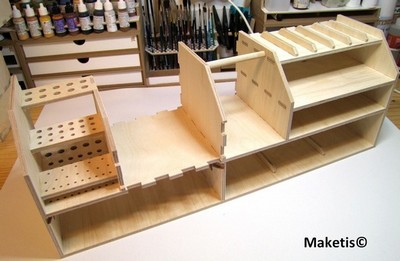
Step 4 : Assembly of the right part, drawers bloc and top plate
No difficulties for this step
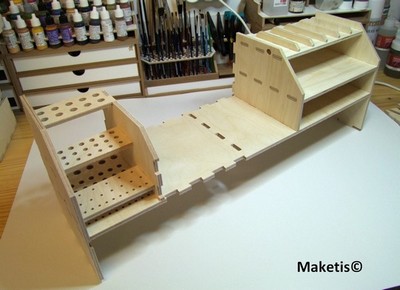
Step 5 : Installation of the lower plate between the left and right part
We put the right part on the working plan as indicated on the photo, then we begin to slot the bottom by pressing well then the top. We turn the set and we slot the left part with the same process.
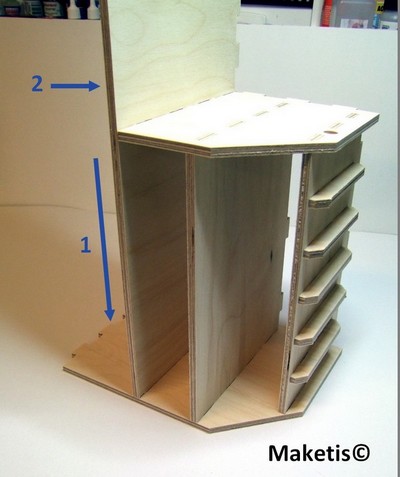
We obtain this result, that really takes shape now !
Step 6 : Installation of the partitions, support for tools and floor.
I recommend you to stick the support at once not to find you stuck in step 7 !
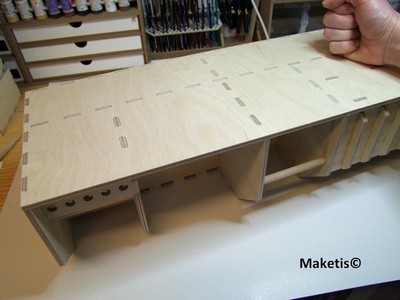
Step 7 : Installation of the back plate.
Put the organizer flat as on the photo, put the glue between crenels and place the back plat. Begin slowly so that every crenel enters well then press with your hand or the mallet for a perfect assembly. It is almost finished!
Final step :
Installation of the front panel for the storage of paints and others bottles
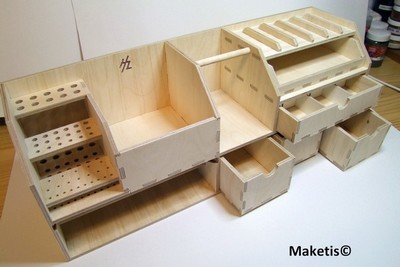
The work is done now and you can leave your organizer for the drying of the glue (half a day or one night is recommanded)
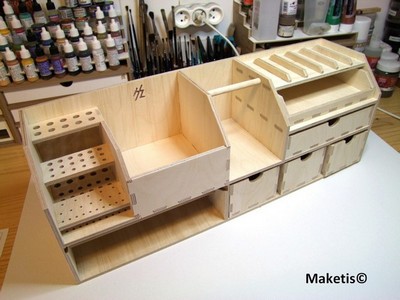
You're ready now to work in very good conditions, your workspace would be clean and organized....
You can include a specific drawer in place of the support for kitchen roll, like this
You'll welcome for a next tutorial !


Von Fabienne 09.09.2023 14:48:13
Bonjour Didier, Les dimensions de l'organiseur sont : Hauteur 17 cm Largeur 22 cm Longueur 60 cm Vous pouvez retrouver ces informations ainsi qu'une description complète dans la partie basse de la fiche article : https://www.maketis.com/fr/accessoires/2944-organiseur-pour-atelier-de-modeliste-hobbyzone-hz-wm1.html Bien cordialement Fabienne
Von Didier 03.01.2018 08:26:30
Bonjour, quelles sont les dimensions de l'organiseur pour atelier de modéliste HobbyZone WM1 ? (largeur x profondeur). Merci, cdlt.